Paper Shoe Pt 4 – Finishing it Up

Part 1 | Part 2 | Part 3

Our sole search is over! We finally finished weaving together the triangles to make the sole of the shoe.

I swear there are over 1,500 triangles used in these soles.

The fact that there was no glue involved in the sole meant that it can flex freely and the sheer number of triangles meant that one could stand on the sole without just completely crushing the paper.

We couldn’t glue on an inner sole because that would take away from the flexibility so instead we only glue important parts, wich included the heel, toes and inner part of the foot for each sole.

Next we started on the upper part of the shoe which we decided to weave like this.

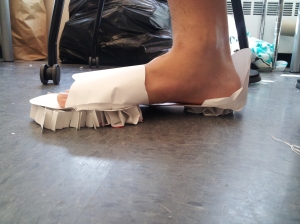
After a lot of tediousness we finally finished our shoe and got this:

It turned out to be more opened toed than we originally planned because we just couldn’t figure out how to create a paper structure for the top that would aesthetically resemble a running shoe while also giving the user the ability to flex their toes. Overall though our group was pleased with the outcome and it functioned for both walking and running!
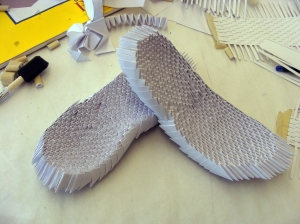
Final Shoe Design Board

Paper Shoe Pt 3 – Triangles

Part 1 | Part 2

We finally figured out how to make the sole of the shoe be strong yet still be flexible with the foot. The answer:

Triangles.

Lots and lots of triangles.

Our plan was to weave them together like this:


Afterwards we could then shape it to be a sole. The structure is very sound and doesn’t need glue so the folded triangles have room to move and be flexible. Once we find a way to bind both ends so that the triangles won’t slip out of place we will have a great structure that is also aesthetically pleasing.

Paper Shoe Pt 2 – Initial Constructing

Part 1

We experimented with a lot of different paper shapes and focused on how to make the paper strong enough to hold up a person.

We tried tubes:

Then honeycomb sheets:


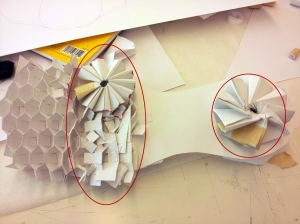
Then folded paper springs:


We tried to combine some of these forms to make a sort of mock up sole to test out:


These forms seemed pretty strong themselves but then it was time to test our sole:

*crunch*  hurrr T.T

Hurrr…even though the structures seemed strong they were no match put up against the full weight of a person. The areas most effected were under the balls of the foot and the heel. The paper spring, although seemed strong, under lots of pressure, flattened and spiraled in on itself. Honeycombs didn’t stand a chance.

Welp, back to the drawing board it is…

Paper Shoe Pt 1 – Objective and Original Concepts

Challenge:

– Design a shoe constructed only of paper and white Elmer’s glue that has a 5/8″ sole and a 1″ heel.

– Attempt to walk in the shoe 25 feet.

Creative Solution: My group decided to design a running shoe which means we had to take into account the flexibility of the sole as well as how to make sure that the sole had the strength to hold up a person. we wanted more of a fitted shoe that would also have the durability to live up to the wear and tear of running.

User Profile:

– Age: 18-45

– Height: 5’8″-6’8″

– Weight: 160-190lbs

Original Concept Sketches:

Bones & Shoes

Humerus Shoe

Pelvis & Boot

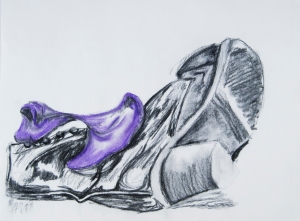
These are drawings of bones and shoes. Don’t ask where I randomly got a humerus and a half of a pelvis. Done in charcoal and pastel. They are 24″x36″ and 18″x24″ respectively.